SLOGA Wheel repair · Tuzla

WORKSHOP GALLERY · TUZLA

Before and after

Eight cases from the workshop in Momanovo: what was damaged, what happened on the machine and how the wheel ended up.

Every picture comes from our own shop

Nothing here comes out of a catalogue. Every wheel you see was on the bench at 3. tuzlanske brigade 128 in Tuzla. The state it arrived in gets photographed first, then whatever is left of it once the welding, the machining and the surface work are finished.

Look at the edge and at the bead seat, because that is where the difference shows most clearly. On some wheels only the appearance was the problem, on others air was escaping or the steering shook at speed. No two cases are alike, so every wheel is inspected in the hand before anything is promised.

Eight cases from the workshop

Each case states what the damage was, how it was solved and what the condition is at the end. Drag the ring to compare the two sides.
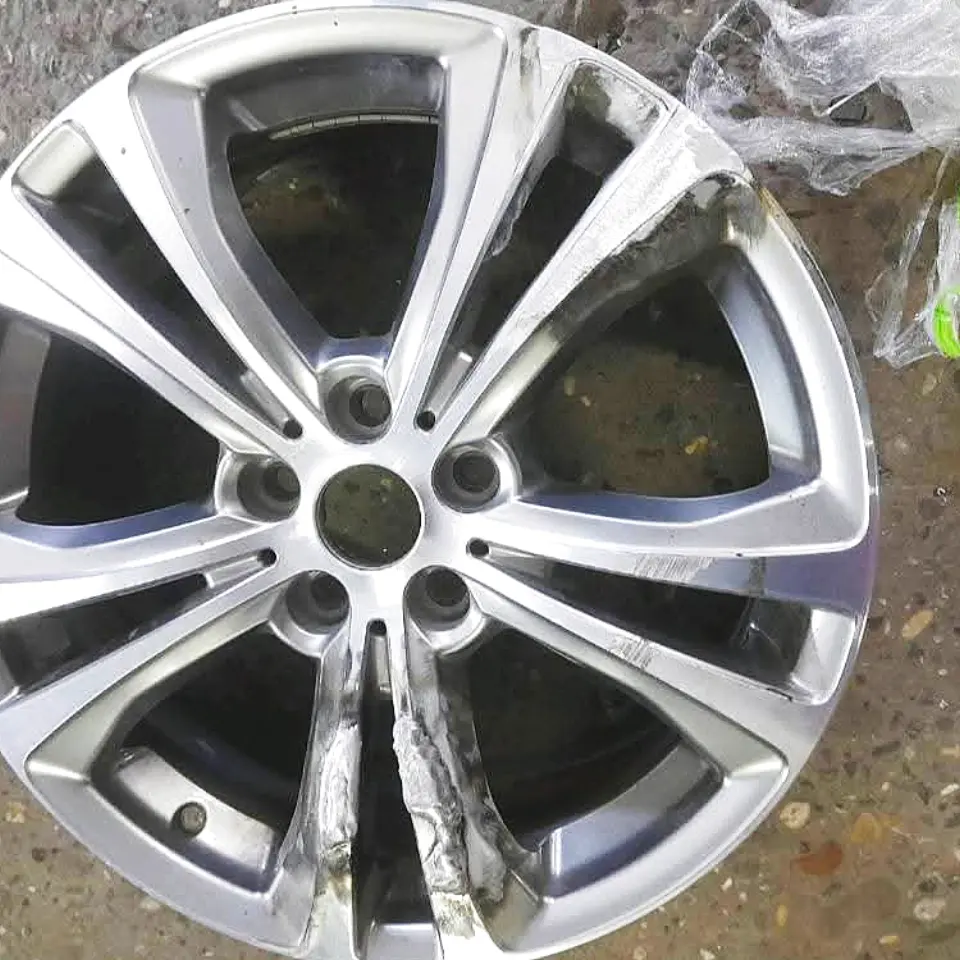
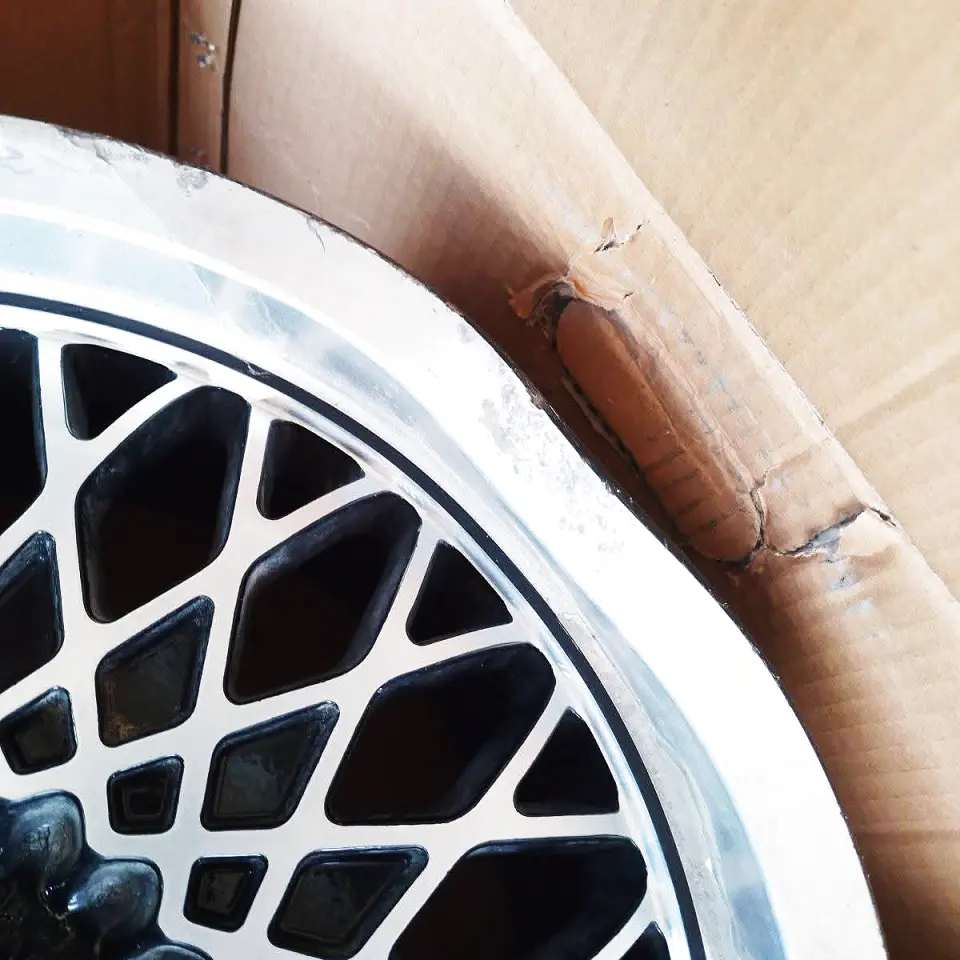
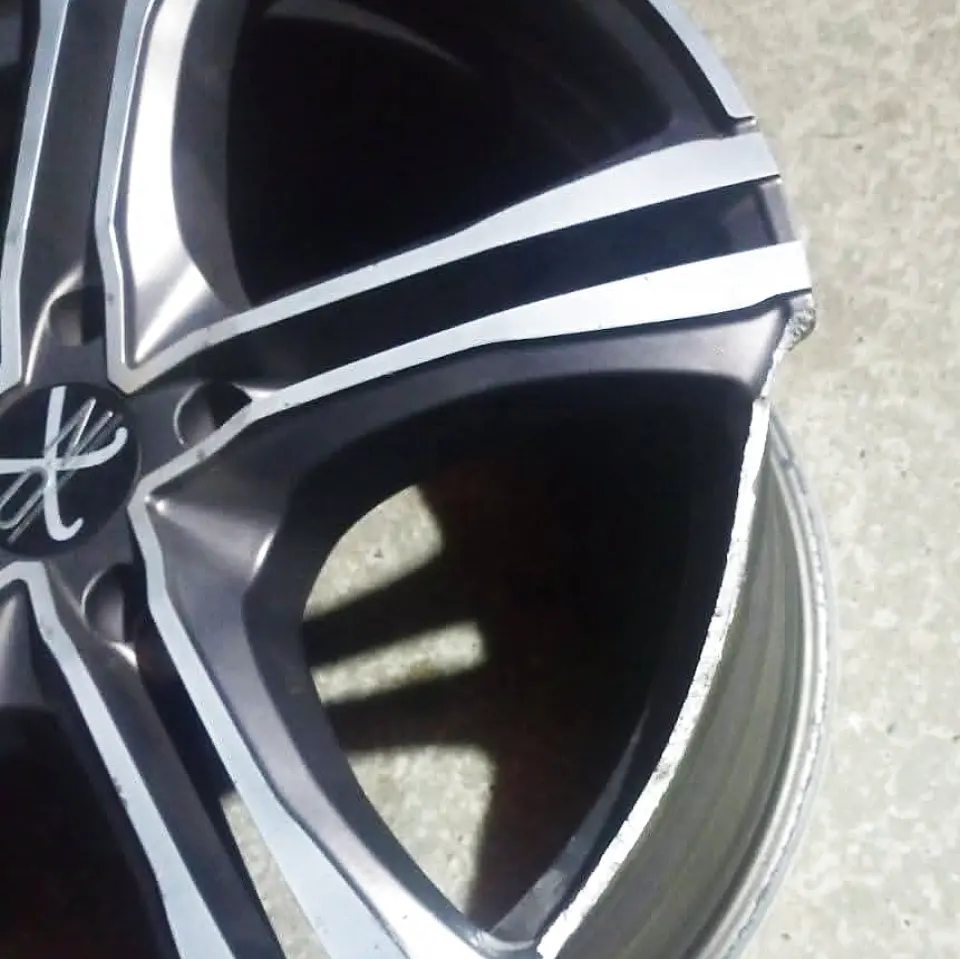
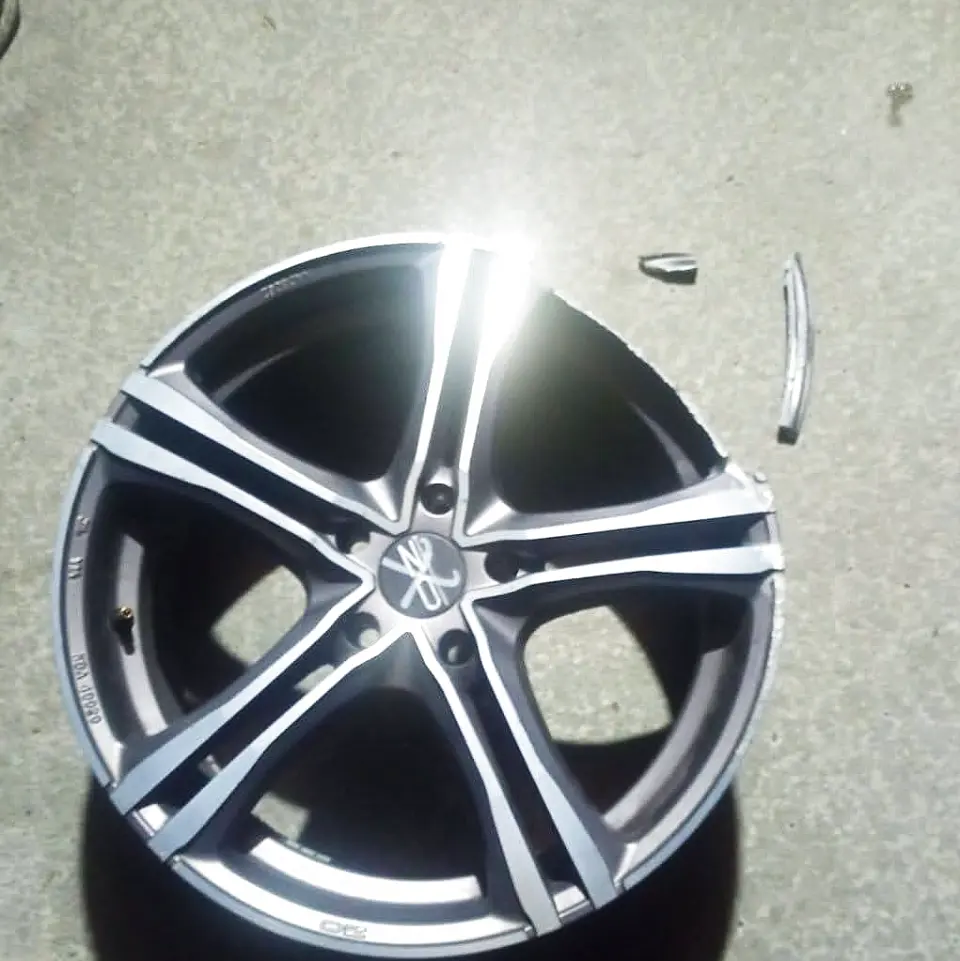
Alloy wheel with a broken-off piece on the outer edge The same wheel after welding and machining, edge full and straight again
Before Drag the ring After

A piece of the rim was missing

01A chunk of material had broken off the outer edge. The rim stayed open at that point, the tyre could not seat properly there and air escaped on every drive.
02The area is cleaned back to sound metal, material is built up in layers by welding, and the surplus is then taken off on the lathe until the original edge profile is back.
03The edge is solid again and runs true without a jump. The tyre seats along the full length of the bead seat, and the wheel goes onto the balancer at the end.
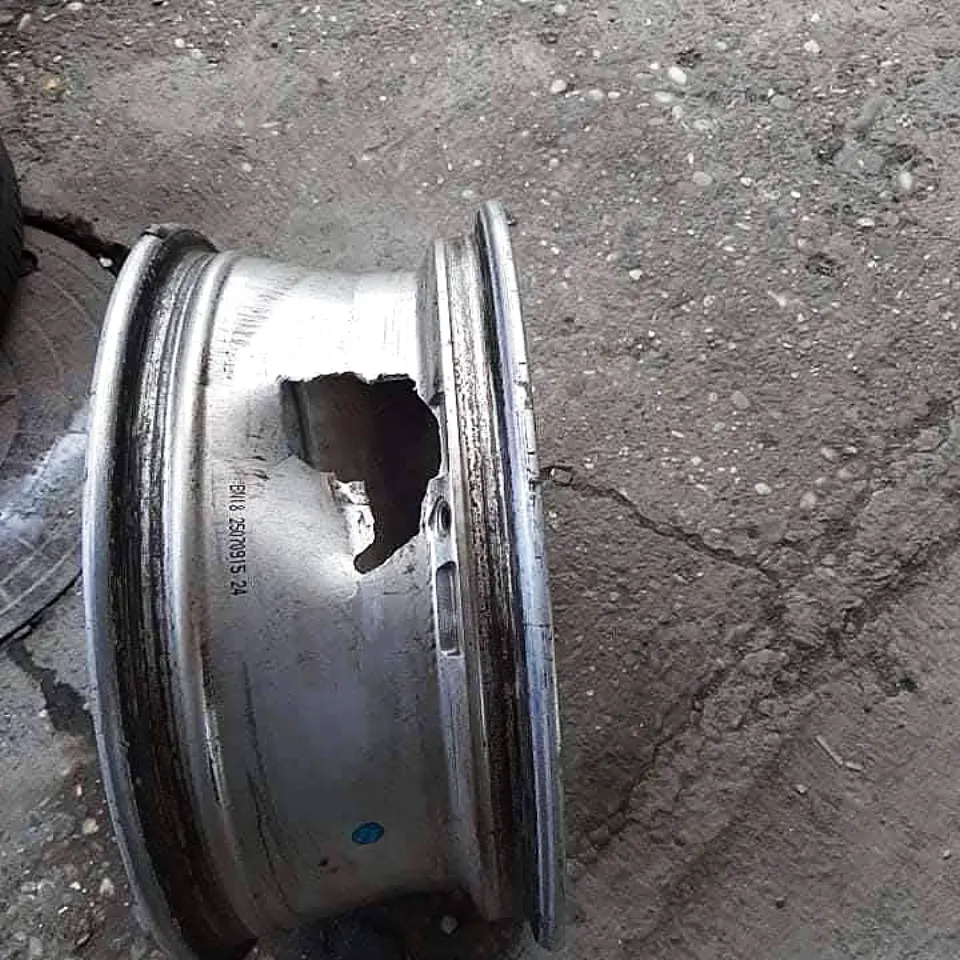
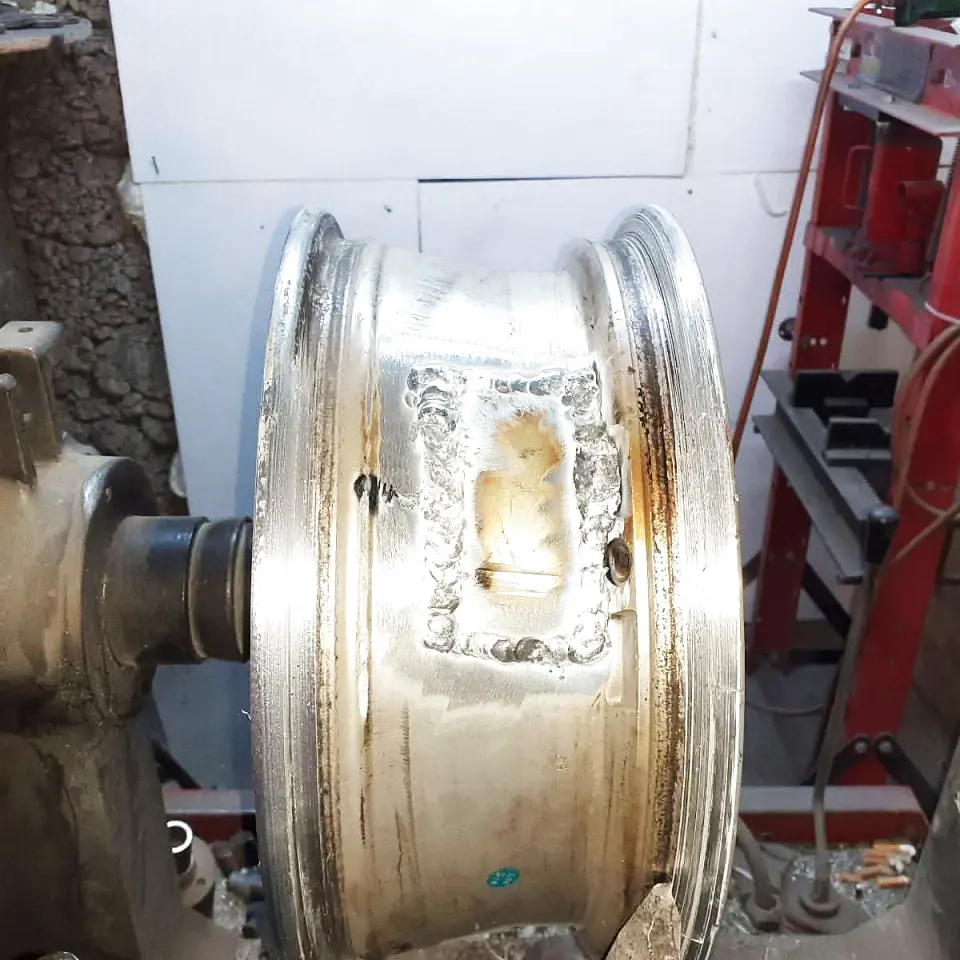
Bead seat of a wheel with a hole punched through and traces of corrosion Closed and levelled bead seat after welding and machining
Before After

Hole in the bead seat

01An impact and corrosion had punched through the flange, leaving a hole where the tyre rests. The tyre went flat within a few days and topping up the air only helped for a short while.
02The hole is opened up to clean material, the edges are thinned and closed by welding. The bead seat is then faced on the machine so that the tyre rests on a flat surface right around the circle.
03The seat holds pressure and the tyre beads without hunting for a spot. The sealing surface is even, with no bulge where the hole used to be.
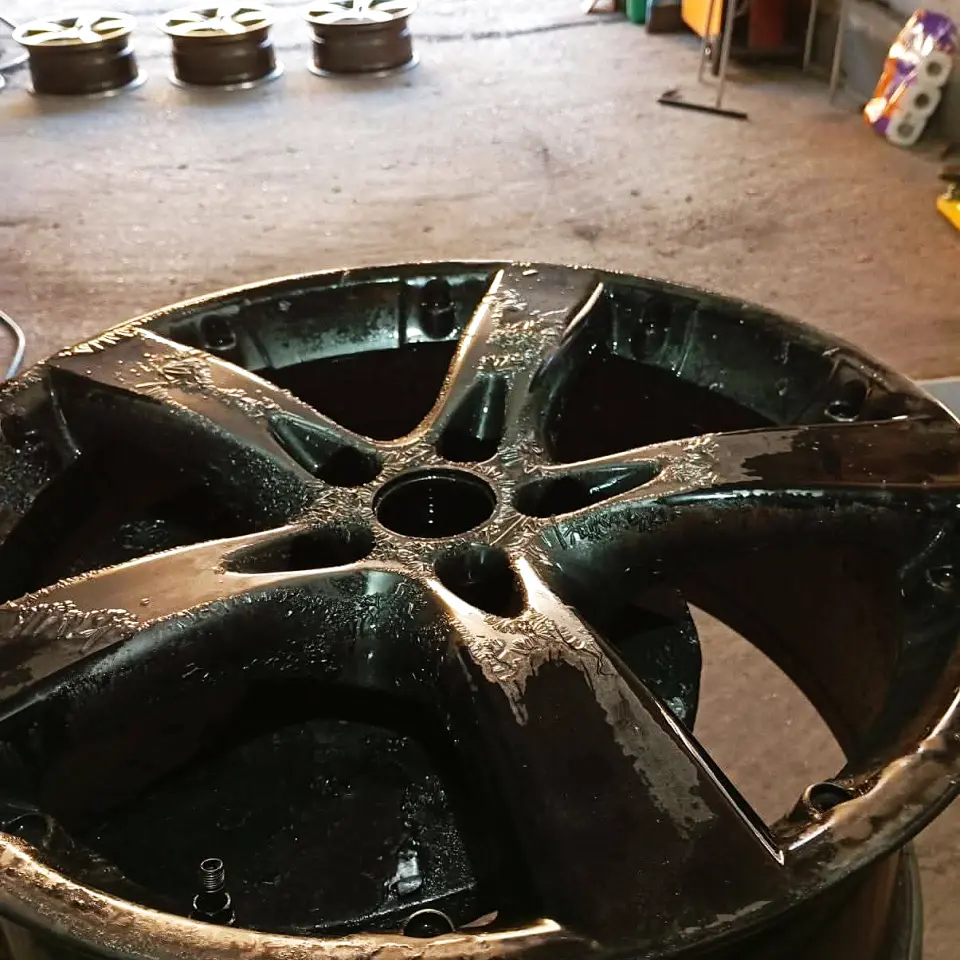
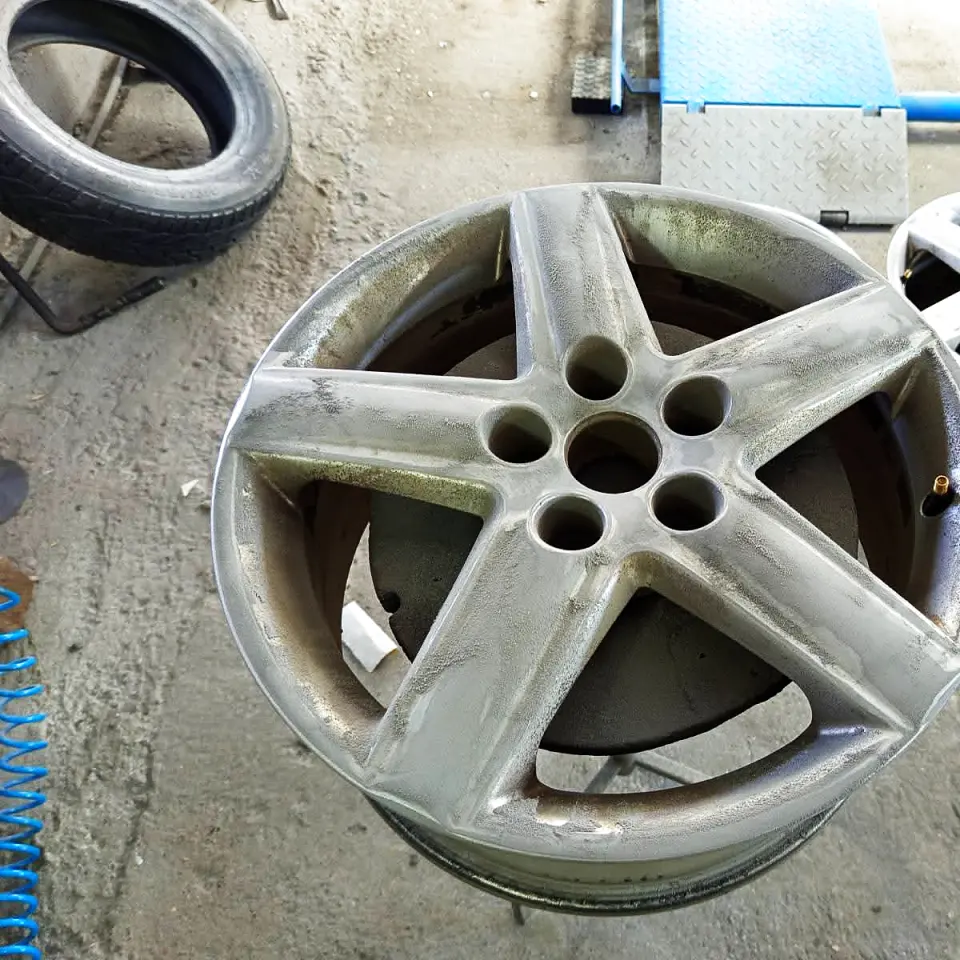
Wheel with cracked paint and white deposits of corrosion The same wheel after the corrosion was removed and new paint applied
Before After

Wheels eaten up by corrosion

01The old paint had cracked and underneath it the aluminium was turning into white powder. Pitted patches had formed on the bead seat and the tyre kept losing air.
02The whole old coating comes off, the corrosion is ground back until sound material is reached, the pitted spots are closed, and preparation, primer and top coat follow.
03The surface is sealed and even once more, with no blisters and no grey stains. The bead seat is clean, so the tyre lies against healthy metal.
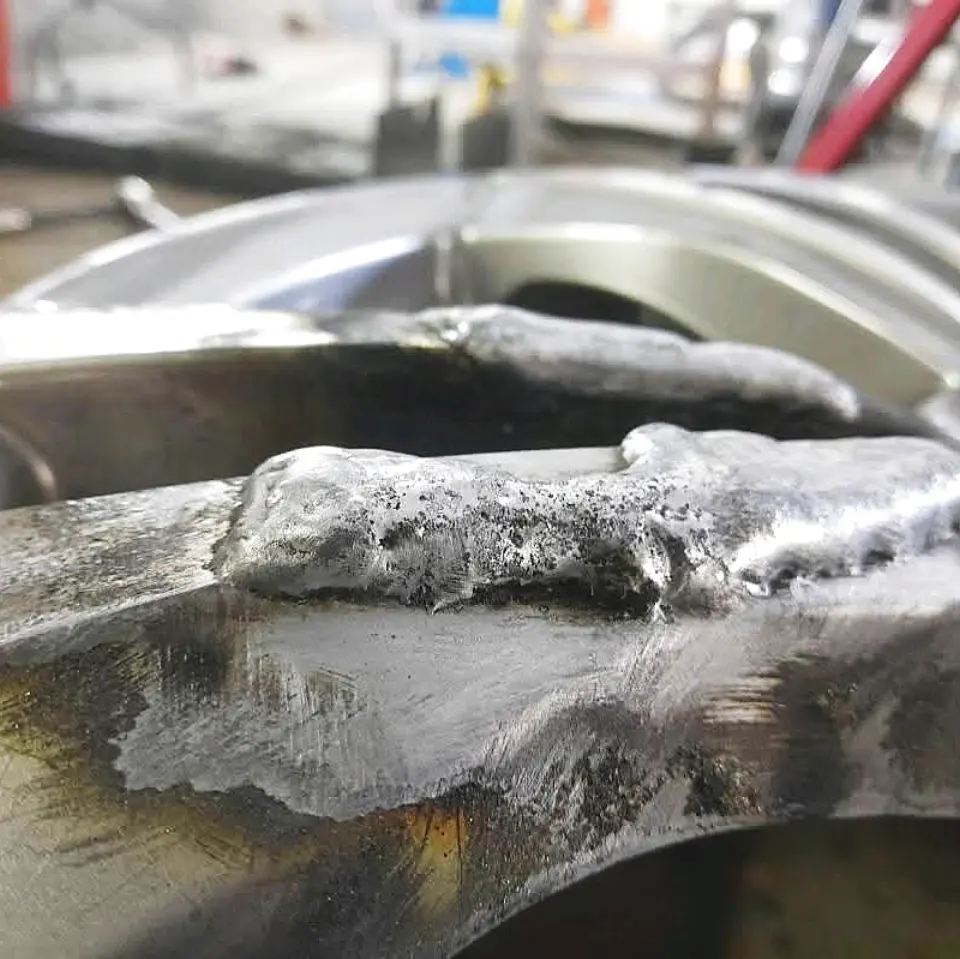
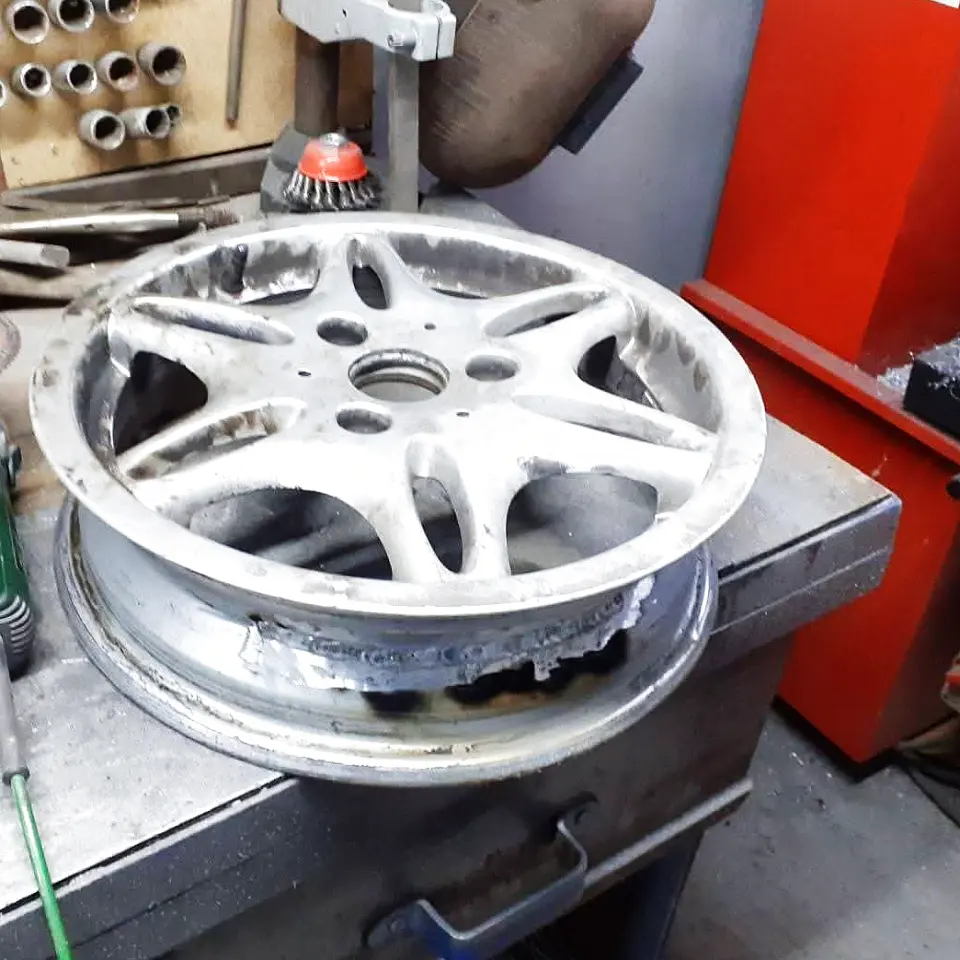
Raised weld seam across the edge of a wheel after a fracture was welded The same spot after grinding and machining, with no visible seam
Before After

A weld you can no longer see

01After a fracture had been welded, a raised bead of material ran across the edge and the spoke. The material held, but the repaired spot was visible from every angle.
02The seam comes down by grinding and machining, step by step, until the line matches the material around it. After that the surface is prepared for paint or for polishing.
03The transition can no longer be felt with a finger, and under paint the welded spot is not recognisable. On a polished lip a slight difference in the metal structure stays.
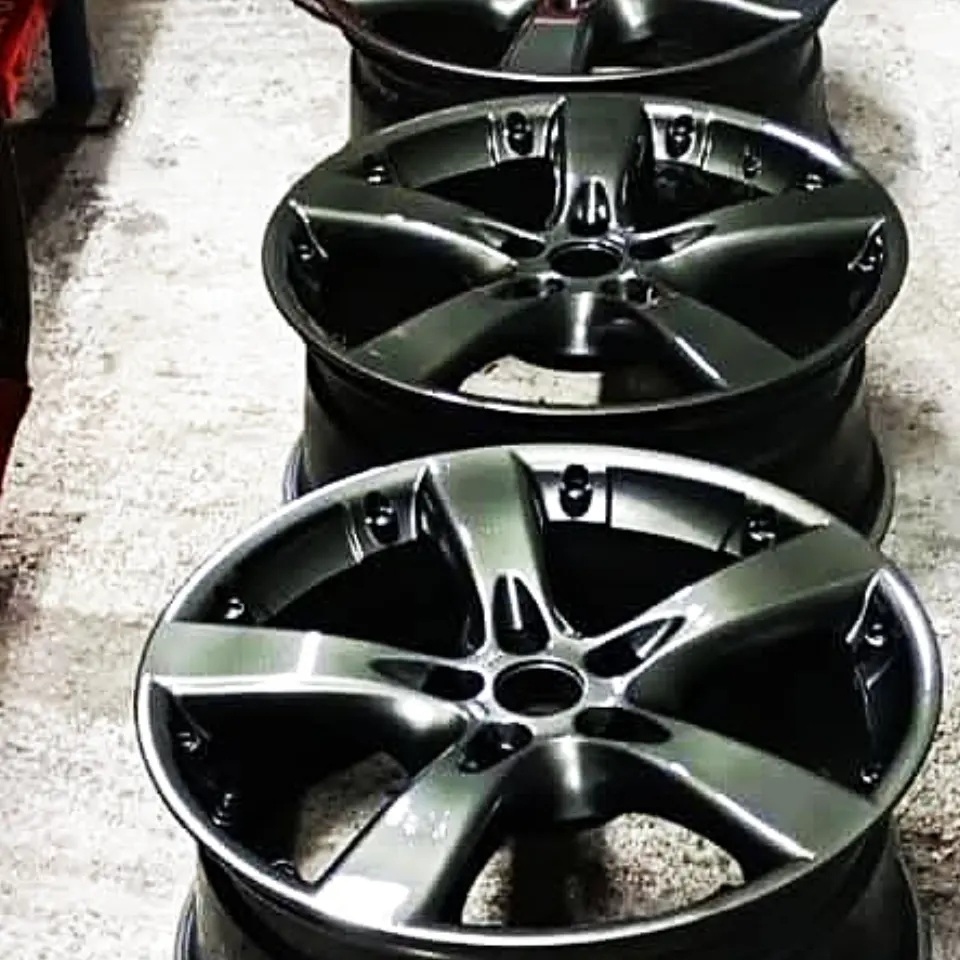
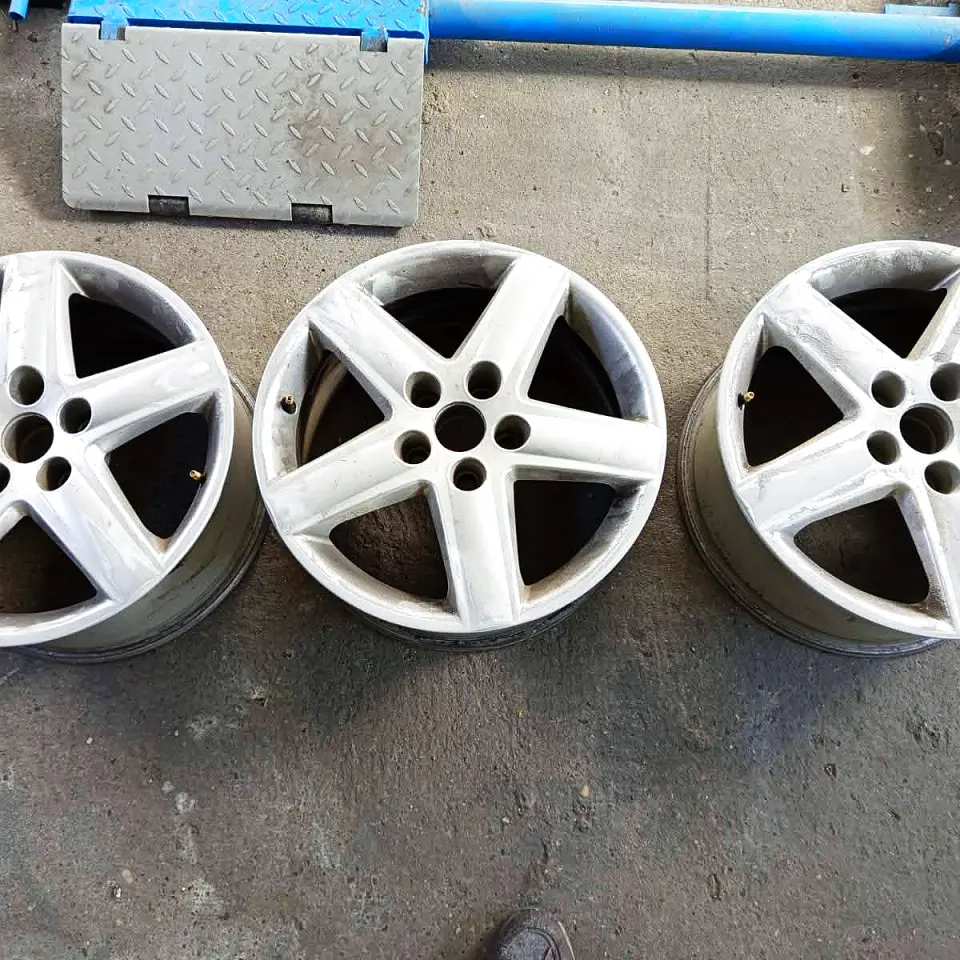
Dull wheel with a grey surface and scuffed edges The same wheel with new paint and a polished lip
Before After

A dull wheel shines again

01The paint had lost its depth, the surface had gone grey and rough, and the edges carried marks from kerbs and from washing with harsh cleaners.
02The old surface is stripped, small injuries are levelled out, the lip is polished, and the rest of the wheel is painted in the chosen shade and finished with a protective coat.
03The shine is even across the whole face, and the polished lip sets off the darker body of the wheel. The edges are straight, with no kerb marks left on them.
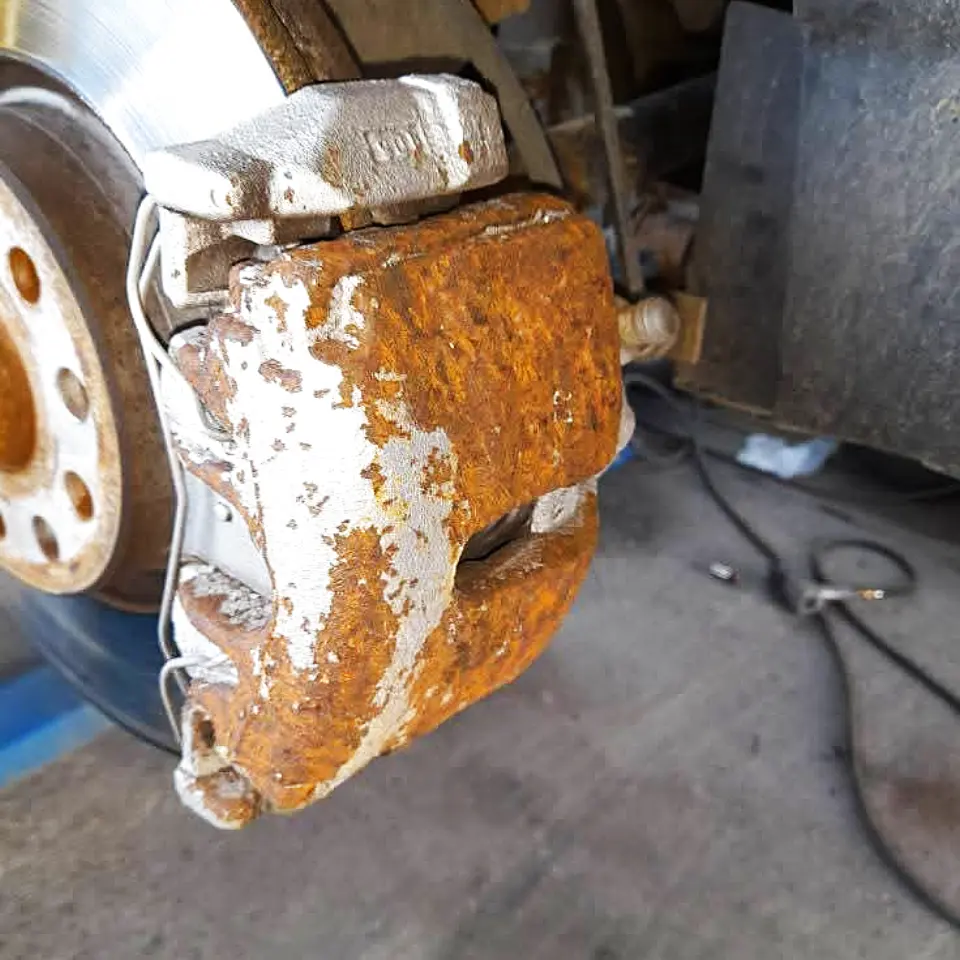
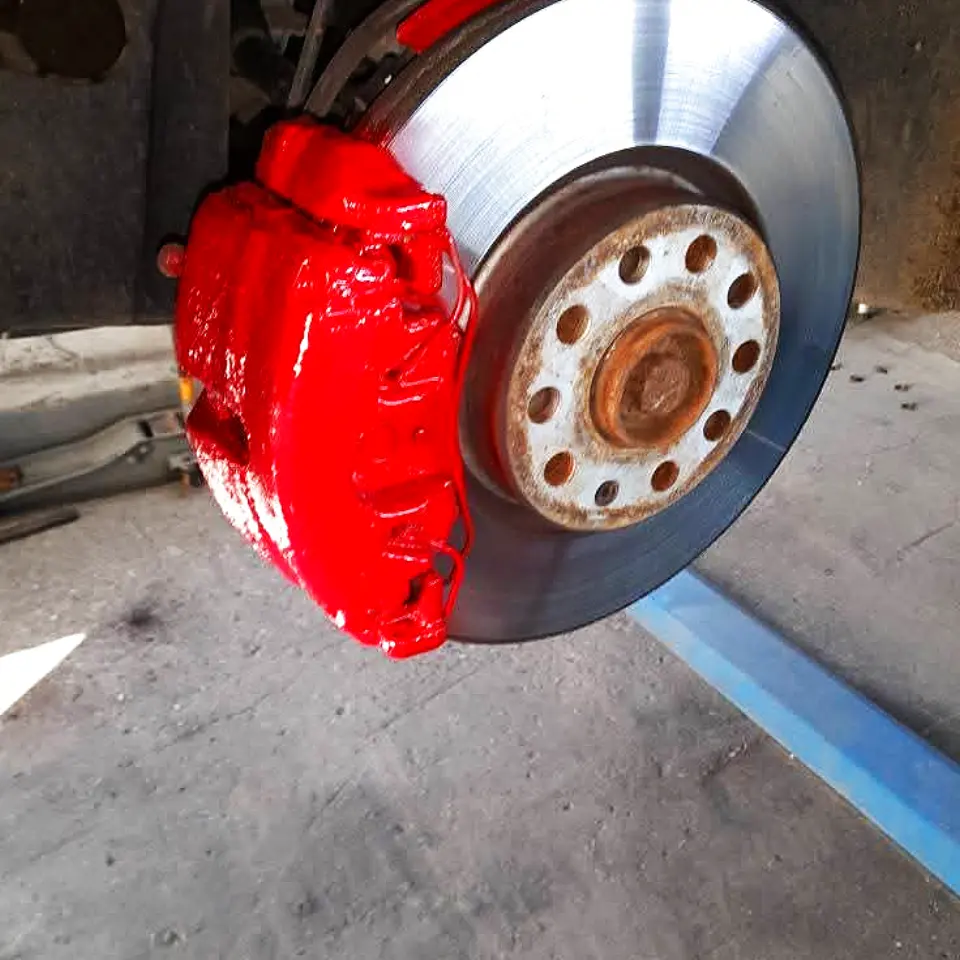
Rusty brake caliper with remnants of old paint The same caliper after cleaning and painting in red
Before After

Brake calipers in colour

01The calipers were covered in rust and remnants of old paint. Behind open spokes a detail like that is on show every time somebody walks around the car.
02The surface is cleaned of rust and old coating, degreased and prepared, then painted with a coating made for brake calipers and applied in thin layers.
03The caliper has an even colour and clean edges, so behind the wheel it reads as a tidy piece of hardware rather than a neglected one.
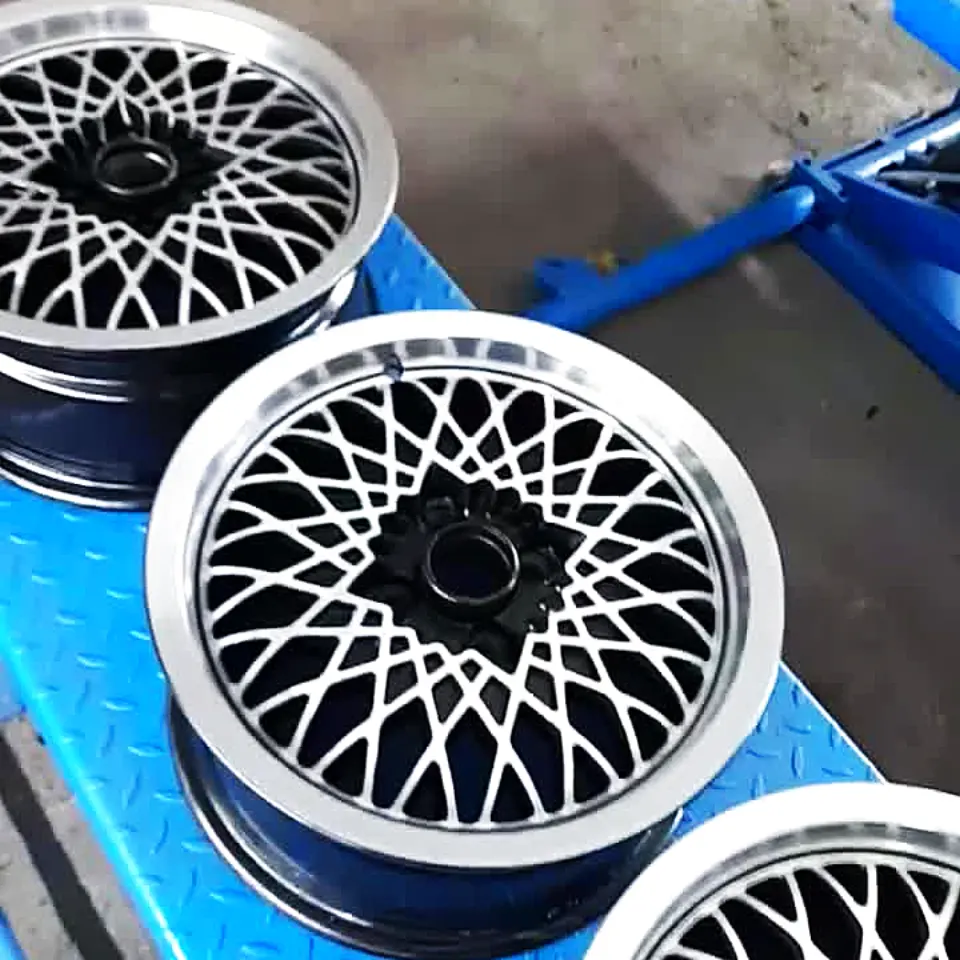
Mesh wheel with worn paint and dirt between the spokes Restored mesh wheel with clean spokes and new paint
Before After

Classic mesh pattern wheel

01A wheel with a dense mesh of thin spokes: brake dust packed into the gaps, paint worn thin, and the edges scuffed against kerbs.
02Every opening is worked by hand, because no machine reaches in between the spokes. Grinding and preparation come first, then the paint, and the edge is finished separately.
03The mesh reads sharp and clear again, with no deposits left in the corners. The edge is straight and the colour is identical on every spoke.
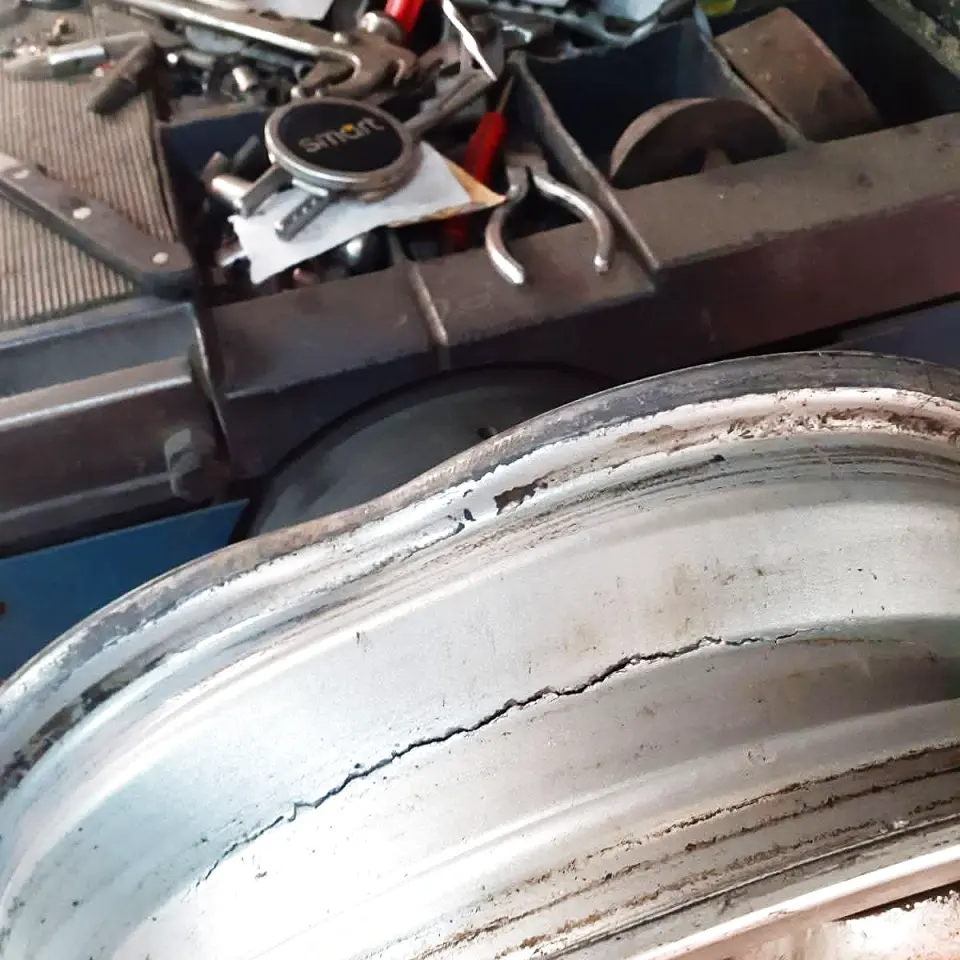
Crack along the barrel of an alloy wheel, marked with chalk Welded and machined crack repair on the barrel of a wheel
Before After

Crack along the rim barrel

01A thin crack ran along the barrel of the wheel. The tyre lost air slowly, and on a rough road you could feel that something was not right.
02The end of the crack is traced and marked, the spot is ground into a V and welded from both sides where access allows, and the surplus material is taken down on the machine.
03The wheel is closed, machined and then balanced with the tyre. If a crack runs into the wheel disc, into the zone that carries the load, the repair is not carried out.

The machines that do this work

Lathe, press, welder and balancer stand in the same room, so a wheel never has to travel from one tradesman to the next.

Turning on the lathe
Wheel balancing
Painting the wheel
Finished set of wheels

Questions about the work shown here

How do I know whether my wheel can be repaired at all?

Send a photo of the damage and of the whole wheel to +387 61 570 429. A picture shows a great deal, but the last word comes when the wheel is on the bench and the tyre is off. If a repair would not be safe, you hear it straight away and the wheel is left untouched.

Is the repaired spot visible after welding?

The seam is ground and machined until it sits level with the material around it. Where paint follows, the area is prepared further and disappears under the coating. On a polished lip a faint difference in the metal structure remains, and you are told that beforehand.

Do you work on steel wheels too, or only on alloy ones?

Both alloy and steel wheels are handled in the shop. Steel wheels are usually straightened and painted, alloy wheels also go on the lathe when roundness has to be brought back. The material decides the order of the work, but both end up on the balancer.

Is the wheel balanced after machining?

Yes, balancing belongs to the job and is not an extra you have to ask for. The tyre goes back on and the wheel is balanced, so there is no vibration in the steering. If the tyre was taken off somewhere else, bring it along and everything is finished in one place.

Can I bring a single wheel or do all four have to come in?

One is enough. Most people turn up with a single wheel after a kerb or a pothole. If painting is involved and you want all four in the same shade, it is better to bring the full set, because an old and a new surface rarely match down to the last detail.

The next wheel here could be yours

Photograph the damage with your phone and send a message. You get an assessment of what can realistically be done.